Are you ready to take your food preservation skills to the next level? Canning is a great way to preserve your fruits, vegetables, and other homegrown goods, but with so many methods out there, it can be tough to know where to start. That’s why we’ve put together this ultimate guide to canning for beginners. In this article, we’ll explore the different canning methods available and help you determine which one is best for you. Whether you’re a seasoned pro or just starting out, this guide has something for everyone. So let’s get started and discover the best canning method for beginners!
What is Canning and Why is it Important for Beginners?
The Basics of Canning
Canning is a food preservation technique that involves heating food and packaging it in airtight containers to prevent spoilage. The process of canning is a way to extend the shelf life of perishable food items such as fruits, vegetables, and meats.
Canning is important for beginners because it allows them to preserve their own food and reduce their reliance on processed and store-bought items. By learning how to can, beginners can save money, reduce waste, and ensure a steady supply of fresh food throughout the year.
Canning is also a great way to experiment with new recipes and flavors, as well as to preserve seasonal produce that might otherwise go to waste. Whether you’re a seasoned home cook or just starting out, canning is a valuable skill to have in your culinary toolkit.
The Benefits of Canning for Beginners
Canning is a method of preserving food by sealing it in sterilized containers, typically glass jars or metal cans, to prevent spoilage and extend its shelf life. This technique is especially useful for beginners who are looking to preserve their homegrown produce or bulk buy non-perishable items. Here are some benefits of canning for beginners:
- Economical: Canning allows you to preserve food items that would otherwise go to waste, making it a cost-effective way to stock your pantry. You can also take advantage of seasonal sales on produce and buy in bulk, which can save you money in the long run.
- Versatile: Canning is not limited to just fruits and vegetables. You can also can meats, seafood, and even pickles and relishes. This means that you can customize your pantry to suit your tastes and dietary needs.
- Nutritious: Canning preserves the nutrients in your food, ensuring that you get the most out of your harvest or grocery haul. You can also control the ingredients that go into your canned goods, making them healthier and more wholesome.
- Convenient: Canned goods are shelf-stable and do not require refrigeration, making them a convenient option for emergency preparedness kits or camping trips. You can also customize your canning schedule to fit your lifestyle, whether that means canning in small batches or taking advantage of larger blocks of free time.
- Creative: Canning allows you to experiment with different recipes and techniques, making it a fun and creative hobby. You can try new flavors and combinations, or stick to tried-and-true classics. Plus, the satisfaction of turning your harvest into a tasty, homemade meal is hard to beat.
Choosing the Right Canning Method for Beginners
Comparing the Most Popular Canning Methods
When it comes to canning, there are several methods to choose from, each with its own advantages and disadvantages. As a beginner, it can be overwhelming to decide which method to use. Here is a brief overview of the most popular canning methods to help you make an informed decision.
Water Bath Canning
Water bath canning is the most common method used by beginners. It involves submerging the jars in boiling water to create a vacuum seal. This method is ideal for low-acid foods such as vegetables, fruits, and pickles.
Pressure Canning
Pressure canning is a more advanced method that involves cooking the food under pressure. This method is necessary for high-acid foods such as tomatoes, meat, and fish. Pressure canning requires special equipment and must be done carefully to ensure food safety.
Fermenting
Fermenting is a method of preserving food by allowing natural bacteria to break down the food. This method is used for products such as sauerkraut, kimchi, and pickles. Fermenting requires careful monitoring of temperature and time to ensure the food is safe to eat.
Freezing
Freezing is a simple and effective method of preserving food. It involves storing food in airtight containers or bags and placing them in the freezer. This method is ideal for foods such as fruits, vegetables, and leftovers.
Dehydrating
Dehydrating involves removing moisture from food to prevent spoilage. This method is used for foods such as fruits, vegetables, and meats. Dehydrating can be done using a dehydrator or by drying food in the sun.
Each method has its own benefits and drawbacks, and the choice of method will depend on the type of food being preserved, personal preference, and available equipment. It is important to follow proper canning techniques and safety guidelines to ensure the food is safe to eat.
Factors to Consider When Choosing a Canning Method
When it comes to choosing the right canning method for beginners, there are several factors to consider. These factors will help you determine which method is best suited for your needs and skill level.
One of the most important factors to consider is the type of food you want to preserve. Different canning methods are better suited for different types of food. For example, water bath canning is ideal for preserving fruits and vegetables, while pressure canning is best for preserving meats and soups.
Another important factor to consider is the amount of time and effort you have available. Some canning methods, such as pressure canning, require more time and effort than others, such as water bath canning. If you are short on time, you may want to consider a method that requires less time and effort.
Your budget is also an important factor to consider. Some canning methods, such as pressure canning, require specialized equipment that can be expensive. If you are on a tight budget, you may want to consider a method that requires less specialized equipment, such as water bath canning.
Your personal preferences and skill level are also important factors to consider. Some people may prefer one method over another based on personal preference, while others may be more comfortable with a certain method based on their skill level.
Overall, it is important to consider all of these factors when choosing a canning method. By taking the time to consider your options, you can choose the best method for preserving your food and ensure that your canned goods turn out delicious and safe to eat.
Water Bath Canning
An Overview of Water Bath Canning
Water bath canning is a popular method of preserving food items that involves cooking them in a large pot of water on a stove top, rather than in a pressure cooker. This method is often used for canning fruits, pickles, and salsa, among other items. The goal of water bath canning is to raise the temperature of the food and the jars to a specific temperature for a specific amount of time, killing any bacteria or microorganisms that may be present.
The key to successful water bath canning is to maintain a consistent temperature throughout the process. This can be achieved by using a candy thermometer to measure the temperature of the water and adjusting the heat accordingly. The water should be brought to a boil and then reduced to a simmer, with the jars submerged in the water for the required amount of time.
Water bath canning is a simple and straightforward method that can be done on a stovetop, making it accessible to beginners. However, it is important to follow proper canning techniques and safety guidelines to ensure that the food is properly preserved and safe to eat. It is also recommended to use high-quality, heat-resistant glass jars and lids to prevent breakage and ensure a proper seal.
Step-by-Step Guide to Water Bath Canning
Water bath canning is a method of preserving food by cooking it in a large pot of boiling water. This method is ideal for preserving fruits, tomatoes, and pickles. Here is a step-by-step guide to water bath canning:
- Prepare the Equipment: You will need a large pot that is deep enough to cover the food, a lid that fits the pot, a funnel, a canning rack, and a canning wand. Make sure all equipment is clean and sterilized before use.
- Prepare the Food: Wash, peel, and core the food you will be canning. Cut the food into the appropriate size for canning.
- Create the Recipe: Mix the food with the appropriate amount of water, sugar, or vinegar, depending on the type of food you are canning. Boil the mixture for a certain amount of time, depending on the type of food, to ensure it is properly cooked.
- Pack the Food: Use a funnel to pack the food into the sterilized jars, leaving enough headspace for the food to expand during cooking.
- Process the Food: Place the jars in the pot, ensuring they are completely covered with water. Bring the water to a boil, then reduce the heat to a simmer. Process the food for a certain amount of time, depending on the type of food, to ensure it is properly sealed.
- Remove the Jars: Carefully remove the jars from the pot with a magnetic wand or tongs. Allow the jars to cool completely before checking the seals.
- Label and Store the Jars: Label the jars with the type of food and date, then store them in a cool, dark place.
Water bath canning is a simple and effective method for preserving food at home. By following these steps, you can create delicious and safe canned goods to enjoy throughout the year.
Tips and Tricks for Successful Water Bath Canning
Adjusting Process Time
When water bath canning, it’s important to pay close attention to the process time recommended for your specific recipe. Factors such as the height and size of your pot, the altitude, and the heat of your stove can all affect the timing. To ensure that your food is properly preserved, it’s important to adjust the process time as needed based on these factors.
Using a Thermometer
To ensure that your water bath canner is at the correct temperature, it’s important to use a thermometer. The recommended temperature for water bath canning is 160-180 degrees Fahrenheit, depending on the specific recipe. By using a thermometer, you can ensure that your canner is at the correct temperature, which will help to ensure that your food is properly preserved.
Cleaning and Sterilizing Your Equipment
To prevent contamination and ensure that your food is properly preserved, it’s important to clean and sterilize your equipment before and after each use. This includes your canning pot, lid, and any other tools or equipment that will come into contact with your food. Be sure to follow the manufacturer’s instructions for cleaning and sterilizing your equipment to ensure that it’s properly prepared for each use.
Testing for Doneness
To ensure that your food is properly preserved, it’s important to test for doneness before removing it from the canner. This can be done by using a wooden spoon or skewer to remove a small amount of food from the jar and checking to see if it’s set properly. If the food is not set, it may need to be processed for a longer period of time.
Using a Pressure Canner for High-Altitude Canning
If you live at a high altitude, it’s important to use a pressure canner instead of a water bath canner. Pressure canners are designed to create a higher level of pressure inside the canner, which helps to ensure that your food is properly preserved at higher altitudes. By using a pressure canner, you can ensure that your food is properly preserved, even at higher elevations.
Pressure Canning
An Overview of Pressure Canning
Pressure canning is a method of preserving food by using pressure to cook and can the food inside a sealed container. It is an alternative to boiling water canning, which is more commonly used for low-acid foods. Pressure canning is recommended for acidic foods such as tomatoes, pickles, and potatoes because it creates a higher temperature and pressure in the jar, which destroys any bacteria that may be present in the food.
One of the benefits of pressure canning is that it allows for a longer shelf life of the canned food. The high temperature and pressure used in pressure canning creates a vacuum seal in the jar, which helps to prevent air from getting in and slowing down the spoilage process. Additionally, pressure canning allows for the canning of foods that cannot be canned using boiling water canning, such as meats and soups.
Pressure canning requires specialized equipment, such as a pressure cooker, and specific temperature and time guidelines must be followed to ensure the food is properly canned. It is important to note that pressure canning is not a substitute for boiling water canning and should only be used for the specific foods and circumstances for which it is recommended.
Step-by-Step Guide to Pressure Canning
Pressure canning is a method of preserving food that involves using heat, pressure, and a specialized piece of equipment called a pressure cooker. This method is particularly useful for preserving foods that are high in acidity, such as tomatoes, which can be prone to botulism when canned using other methods. Here is a step-by-step guide to pressure canning:
- Prepare your equipment: Before you begin canning, make sure that your pressure cooker is clean and in good working order. You should also check the pressure gauge to ensure that it is functioning properly.
- Prepare your food: Wash and prepare your food, cutting it into the appropriate size for canning. Be sure to remove any bones or seeds, as these can interfere with the canning process.
- Pack the jars: Pack the jars with the food, leaving enough headspace at the top to allow for expansion during the canning process.
- Set the pressure: Set the pressure on your pressure cooker according to the specific canning recipe you are using. For most low-acid foods, the pressure should be set at 10 pounds. For high-acid foods, the pressure should be set at 15 pounds.
- Add water: Add enough water to the pressure cooker to create a slight pressure. The amount of water will depend on the size of your pressure cooker and the number of jars you are canning.
- Cook the food: Cook the food in the pressure cooker according to the specific canning recipe you are using. This typically involves heating the food to a specific temperature and holding it there for a set amount of time.
- Cool the jars: Once the canning process is complete, remove the jars from the pressure cooker and allow them to cool completely before checking the seals.
- Check the seals: Check the seals on the jars to ensure that they are properly sealed. Any jars that do not seal properly should be refrigerated and used within a few weeks.
By following these steps, you can ensure that your food is properly canned and preserved for future use. Remember to always follow safe canning practices and use the proper equipment to avoid any potential health risks.
Tips and Tricks for Successful Pressure Canning
When it comes to pressure canning, there are a few tips and tricks that can help ensure a successful outcome. Here are some things to keep in mind:
- Check your equipment: Before you start canning, make sure your pressure canner is in good working order. Check the valve, gauge, and sealing ring to ensure they are functioning properly.
- Use the right amount of water: The amount of water you use in your pressure canner is important. Always add enough water to cover the food by at least an inch, but don’t add so much that it makes the canner too heavy to lift.
- Watch the time: Pressure canning requires precise timing to ensure that the food is properly sterilized. Make sure you start the timer when the canner reaches the correct pressure, and don’t turn off the heat until the canner has cooled down completely.
- Use the right amount of headspace: Leaving the right amount of headspace in your jars is crucial for successful canning. The headspace is the space between the top of the jar and the food. Leave too little headspace, and the food may not seal properly; leave too much, and the food may expand and cause the jar to break.
- Test the seal: After canning, always test the seal of your jars to make sure they are properly sealed. A properly sealed jar will feel firm when you press on it, and the lid will not flex when you tilt the jar.
- Store your canned goods properly: Once your canned goods are cooled, store them in a cool, dark place with good ventilation. Avoid storing them in the refrigerator or freezer, as this can cause the food to freeze and expand, potentially causing the jars to break.
By following these tips and tricks, you can ensure that your pressure canning efforts are successful and that your canned goods will last for years to come.
Comparison of Water Bath and Pressure Canning
Advantages and Disadvantages of Each Method
Water bath canning and pressure canning are two popular methods of preserving food, but they have their own advantages and disadvantages. Here’s a closer look at each method:
Water Bath Canning
Advantages:
- Easy to use and requires minimal equipment
- Suitable for low-acid foods, such as tomatoes and potatoes
- Provides a consistent temperature throughout the canning process
- Can be done in a large batch, making it ideal for canning clubs or parties
Disadvantages:
- Limited in the variety of foods that can be canned
- Can be time-consuming for large batches
- Risk of spoilage if the jars are not processed correctly
Pressure Canning
- Allows for the canning of a wider variety of foods, including acidic ones
- Provides a higher level of sterilization, reducing the risk of botulism
- Can process foods faster than water bath canning
-
Provides a better seal, reducing the risk of spoilage
-
Requires more equipment and can be more difficult to use
- Can be more expensive than water bath canning
- May not be suitable for canning in large batches
In conclusion, both water bath and pressure canning have their own advantages and disadvantages, and the choice between the two will depend on the type of food being canned and the equipment available. For beginners, water bath canning may be a good place to start, as it is easier to use and requires less equipment. However, as experience and skill increase, pressure canning may become a more viable option for preserving a wider variety of foods.
When to Use Water Bath Canning
Water bath canning is a method of preserving food by cooking it in a large pot of water and then canning it in sterilized jars. It is a traditional method that has been used for generations and is still popular today.
When to Use Water Bath Canning
- For high-acid foods: Water bath canning is recommended for high-acid foods such as tomatoes, fruit, and pickles. High-acid foods have a pH of 4.6 or lower and can be processed in a water bath canner.
- For low-acid foods: If you’re looking to can low-acid foods like vegetables, you may need to use a pressure canner. Low-acid foods have a pH of 4.6 or higher and require a higher temperature to be safely canned.
- For sensitive equipment: If you have sensitive equipment, such as a glass top stove, you may want to use a water bath canner as it is less likely to cause damage.
- For small batches: If you’re canning in small batches, a water bath canner may be more convenient as it is easier to heat and fill.
Overall, water bath canning is a great option for those who are new to canning or for those who prefer a more traditional method. It is important to follow the proper guidelines and procedures to ensure the safety of your food.
When to Use Pressure Canning
Pressure canning is a method of preserving food that involves using heat, pressure, and a pressure cooker to kill bacteria and preserve the food item. This method is particularly useful for preserving acidic foods, such as tomatoes, because it allows for a higher level of heat to be used, which helps to preserve the flavor and texture of the food.
Pressure canning is also a good option for preserving foods that have a high water content, such as soups and stews, because it helps to prevent the food from becoming overcooked and mushy. Additionally, pressure canning is a good option for preserving foods that are high in sugar or starch, such as jams and jellies, because it helps to prevent the food from crystallizing.
In general, pressure canning is a good option for preserving foods that are acidic, have a high water content, or are high in sugar or starch. However, it is important to note that pressure canning requires specialized equipment and should only be done by those who are experienced with this method.
Alternative Canning Methods
Dehydrating Food for Preservation
Dehydrating food is a popular method of preserving food items. This method involves removing moisture from food, which slows down the growth of bacteria and other microorganisms. This helps to increase the shelf life of the food, while retaining its nutritional value and flavor.
Dehydrating food is a simple process that can be done using a dehydrator or even in the oven. Here are the steps to follow:
- Wash and prepare the food items you want to dehydrate. Make sure they are clean and free from any dirt or debris.
- Slice the food items into thin pieces, so that they dry evenly.
- Spread the slices evenly on the dehydrator trays or on a baking sheet.
- Set the temperature and time according to the type of food you are dehydrating. The temperature for dehydrating food is usually between 120°F to 140°F (49°C to 60°C), and the drying time can range from a few hours to several days.
- Check the food periodically to ensure that it is drying evenly. Once the food is dry, it should be crisp and have a lighter weight than its original state.
- Store the dehydrated food in an airtight container in a cool, dry place.
Dehydrating food is a great way to preserve fruits, vegetables, herbs, and even meat. It is a cost-effective and convenient method of preserving food items, as it does not require any special equipment or chemicals. Dehydrated food can be used in a variety of dishes, from soups and stews to cereals and snacks.
Here are some examples of food items that can be dehydrated:
- Fruits: bananas, apples, pears, grapes, and berries
- Vegetables: tomatoes, potatoes, carrots, onions, and peppers
- Herbs: basil, oregano, thyme, and rosemary
- Meat: beef, pork, chicken, and fish
In conclusion, dehydrating food is a simple and effective method of preserving food items. It is a safe and natural way to extend the shelf life of your favorite fruits, vegetables, and meats, while retaining their nutritional value and flavor. Give it a try and discover the many benefits of dehydrating food for preservation.
Freezing Food for Preservation
Freezing is a simple and effective method for preserving food. It involves storing food at temperatures below freezing point, which slows down the growth of bacteria and other microorganisms. This method is particularly useful for preserving fruits and vegetables that are in season, as well as meats and seafood.
Here are some tips for freezing food:
- Clean and dry the food: Before freezing, make sure to clean and dry the food thoroughly. This will prevent the formation of ice crystals, which can damage the texture and flavor of the food.
- Package the food properly: Use airtight containers or freezer bags to store the food. Squeeze out as much air as possible from the bags to prevent freezer burn. Label the containers or bags with the name of the food and the date of freezing.
- Freeze food in smaller portions: Freezing food in smaller portions makes it easier to thaw and use as needed. You can also label the portions with the type of food and the date of freezing.
- Thaw food properly: To thaw frozen food, transfer it to the refrigerator overnight or use the microwave. Do not thaw food on the counter, as this can allow bacteria to grow.
- Use the right techniques for different types of food: Different techniques are required for freezing different types of food. For example, meat and poultry should be frozen at a temperature of -4°F (-20°C), while fish and shellfish should be frozen at a temperature of -31°F (-35°C).
Freezing is a convenient and practical method for preserving food, especially during the off-season. By following these tips, you can ensure that your frozen food stays fresh and delicious for a long time.
Pickling and Fermenting Food for Preservation
Pickling and fermenting are two popular alternative methods for preserving food. These methods involve the use of vinegar, salt, or other preserving agents to create an acidic environment that prevents the growth of harmful bacteria. This process not only extends the shelf life of the food but also enhances its flavor and nutritional value.
Pickling
Pickling is a process of preserving vegetables and fruits in a vinegar-based solution. It is a traditional method of preserving food that has been used for centuries. Pickling involves immersing the food in a solution of vinegar, water, and spices, which creates an acidic environment that prevents the growth of bacteria.
There are several types of pickling methods, including:
- Boiling water bath: This method involves boiling the pickling solution, adding the food, and then boiling for a specific amount of time.
- Cold pack: This method involves using a cold pickling solution and refrigerating the food for a specific amount of time.
- Refrigerator pickling: This method involves using a vinegar-based solution and storing the food in the refrigerator for a specific amount of time.
Fermenting
Fermenting is a process of preserving food using natural bacteria to create an acidic environment that prevents the growth of harmful bacteria. Fermenting is commonly used to preserve vegetables, fruits, dairy products, and meats.
There are several types of fermenting methods, including:
- Lactic fermentation: This method involves using lactic acid bacteria to preserve food.
- Alcohol fermentation: This method involves using yeast to convert sugar into alcohol, which creates an acidic environment that preserves the food.
- Acetic fermentation: This method involves using acetic acid bacteria to create vinegar, which preserves the food.
Benefits of Pickling and Fermenting
Pickling and fermenting not only preserve food but also offer several health benefits. These methods increase the nutritional value of the food by breaking down the fibers and making the nutrients more readily available. Pickling and fermenting also create probiotics, which are beneficial bacteria that can improve digestion and boost the immune system.
Tips for Pickling and Fermenting
- Use clean and sterilized equipment to prevent contamination.
- Use fresh, high-quality ingredients for the best results.
- Follow the recommended pickling or fermenting times for safety.
- Experiment with different spices and seasonings to create unique flavors.
Overall, pickling and fermenting are excellent alternative methods for preserving food. They not only extend the shelf life of the food but also enhance its flavor and nutritional value. With these methods, you can enjoy a variety of delicious and healthy foods throughout the year.
Safety Precautions for Canning Beginners
Understanding the Risks of Canning
Canning is a fun and rewarding hobby that allows you to preserve your favorite foods for future enjoyment. However, it’s important to understand the risks involved in canning to ensure that you stay safe while you’re cooking.
One of the biggest risks associated with canning is the potential for botulism. This dangerous bacteria thrives in low-acid environments, such as those created by high-sugar or high-fat foods. To prevent botulism, it’s important to use proper canning techniques and monitor the temperature and pH levels of your food.
Another risk associated with canning is the potential for foodborne illness. This can be caused by a variety of factors, including improper sterilization of equipment, cross-contamination, and improper storage. To minimize the risk of foodborne illness, it’s important to follow proper hygiene practices and store your canned goods in a clean, cool place.
Finally, there is a risk of explosion when canning. This can occur if you’re not careful when handling hot jars or if you don’t allow enough headspace in your jars. To prevent explosions, it’s important to use proper techniques for filling jars and allowing for headspace.
Overall, it’s important to understand the risks associated with canning and take appropriate precautions to stay safe while preserving your food. By following proper techniques and guidelines, you can enjoy the benefits of canning without putting yourself or others at risk.
How to Avoid Common Mistakes in Canning
Canning is a great way to preserve food and extend its shelf life, but it’s important to do it safely to avoid any risks. Here are some common mistakes to avoid when canning:
- Not sterilizing the jars properly: It’s crucial to sterilize the jars before use to prevent the growth of mold and bacteria. Boil the jars for 10 minutes and then let them cool before use.
- Overfilling the jars: Overfilling the jars can cause the food to spill over and contaminate the lid, which can lead to spoilage. Make sure to leave enough headspace at the top of the jar to allow for expansion during the canning process.
- Using improperly sterilized lids: Lids that are not properly sterilized can cause contamination and spoilage. Make sure to sterilize the lids along with the jars before use.
- Not checking the temperature of the food: It’s important to make sure that the food is heated to the correct temperature before canning to ensure that it’s properly sterilized. Use a thermometer to check the temperature of the food.
- Leaving the lid loose: Leaving the lid loose can allow air to enter the jar, which can cause the food to spoil. Make sure to tighten the lid firmly to create a vacuum seal.
- Using old or damaged equipment: Using old or damaged equipment can increase the risk of contamination and spoilage. Make sure to use clean, sterilized equipment and replace any damaged or worn-out parts.
By avoiding these common mistakes, you can ensure that your canned food is safe to eat and will last longer on the shelf.
Essential Safety Tips for Beginners
As a beginner in canning, it is crucial to understand the safety precautions involved in the process. Canning is a great way to preserve food, but it can also be dangerous if not done correctly. Here are some essential safety tips for beginners:
- Use proper canning techniques: Follow the guidelines and recommendations provided by the USDA or the National Center for Home Food Preservation when canning. This will ensure that you are using the right methods and equipment for each type of food you are preserving.
- Clean and sanitize all equipment: Before using any canning equipment, make sure to clean and sanitize it thoroughly. This will prevent the growth of harmful bacteria and ensure that your food is safe to eat.
- Use the right types of jars and lids: Use new, sterilized jars and lids that are specifically designed for canning. Avoid using jars with chips or cracks, as these can compromise the seal and allow bacteria to enter.
- Check for proper temperature and pressure: Make sure that your canning environment is at the correct temperature and pressure for the specific type of food you are preserving. This will ensure that the food is properly sealed and will remain safe to eat.
- Monitor for signs of spoilage: Check your canned food for signs of spoilage, such as off odors, discoloration, or mold. If you notice any of these signs, discard the food immediately.
- Practice good hygiene: Wash your hands thoroughly before and after canning, and avoid touching your face or hair while handling food. This will prevent the spread of harmful bacteria and ensure that your food is safe to eat.
By following these essential safety tips, you can ensure that your canning process is safe and effective. Remember, canning can be a fun and rewarding hobby, but it requires careful attention to detail to ensure that your food is properly preserved.
Recap of the Best Canning Methods for Beginners
For those who are new to canning, it can be overwhelming to choose the best method for preserving their food. Here is a quick recap of the most popular canning methods for beginners:
- Water Bath Canning: This method is best for low-acid foods such as vegetables, fruits, and seafood. It involves submerging the jars in boiling water to sterilize them and ensure a safe seal.
- Pressure Canning: This method is recommended for high-acid foods such as tomatoes, pickles, and chutney. It uses pressure to create a seal, which ensures that the food is safely preserved.
- Freezing: This is a simple and effective method for preserving foods that are high in sugar or acid, such as berries, cherries, and corn. It involves freezing the food in airtight containers or freezer bags.
Each method has its own set of guidelines and equipment requirements, so it’s important to choose the right one for the food you want to preserve. Once you’ve chosen your method, be sure to follow all safety precautions to ensure that your food is properly preserved and safe to eat.
Encouragement to Give Canning a Try
If you’re a beginner in canning, it’s natural to feel a bit intimidated. But fear not! Canning is a skill that anyone can learn with a little bit of practice and patience. Here are some reasons why you should give canning a try:
- Canning allows you to preserve your own food, which can save you money in the long run.
- Canning is a great way to use up seasonal produce that might otherwise go to waste.
- Canning is a fun and rewarding hobby that can be enjoyed by people of all ages.
- Canning can be a great way to connect with other people who share your passion for food preservation.
So, what are you waiting for? Grab some canning supplies, follow the instructions in this guide, and start preserving your own food today!
Resources for Further Learning
For those looking to expand their knowledge on canning, there are numerous resources available to help beginners learn and understand the best practices for preserving their food. Some recommended resources include:
- Books: “Canning and Preserving: The Ultimate Guide” by Ashley English and “The Complete Book of Home Preserving” by Jeanette E. Fisher and Linda Gilbert
- Online Canning Courses: “Canning 101” from the University of Georgia and “Preserving Food at Home” from the National Center for Home Food Preservation
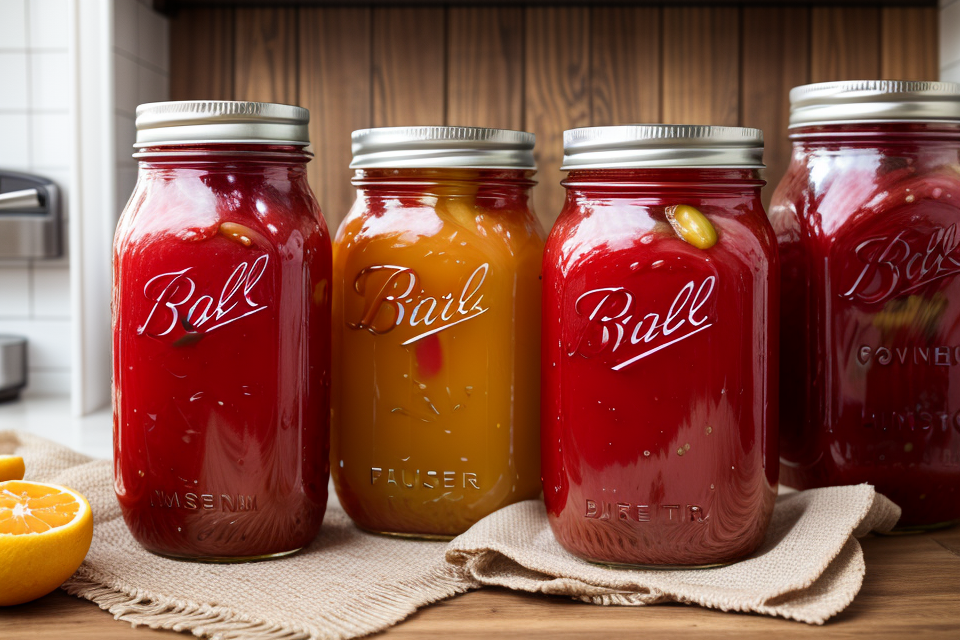
- Websites: “National Center for Home Food Preservation” and “Ball Canning Jars”
- Blogs: “Food in Jars” and “Canning Granny”
By utilizing these resources, beginners can gain a comprehensive understanding of the various canning methods, safety guidelines, and recipes to get started on their preserving journey.
FAQs
1. What is canning and why is it important?
Canning is a method of preserving food by heating it in a sealed container to destroy bacteria and prevent spoilage. It is an important skill to learn for those who want to preserve their own food at home, as it allows them to store fresh produce and meals for later use.
2. What are the different canning methods for beginners?
There are several canning methods for beginners, including hot water bath canning, pressure canning, and oven canning. Each method has its own set of guidelines and requirements, so it’s important to choose the right one for the type of food you want to preserve.
3. What equipment do I need to get started with canning?
To get started with canning, you will need a few basic tools, including a canning pot, a canning rack, a funnel, and some jar lids and rings. You may also want to invest in a kitchen scale and a thermometer to ensure that your food is being processed properly.
4. How do I prepare my food for canning?
Before canning, it’s important to properly prepare your food by washing, peeling, and slicing it into appropriate sizes. You should also consider adding an acid or sugar to your food to help prevent the growth of harmful bacteria.
5. How long does canning take?
The amount of time it takes to can your food will depend on the method you are using and the size of your batch. Generally, hot water bath canning takes about 10-20 minutes per batch, while pressure canning takes about 30-60 minutes per batch.
6. How do I know if my canning is successful?
After canning, it’s important to check your food to ensure that it has been properly preserved. You can do this by using a food thermometer to check the temperature of your food, or by checking for an “acid ring” on the top of your jars.
7. What are some beginner-friendly canning recipes?
There are many beginner-friendly canning recipes available, including basic dill pickles, sweet and sour cherry pie filling, and spicy pepper jelly. You can also find recipes for preserving fresh vegetables like tomatoes, beans, and corn.
8. Where can I find more information on canning for beginners?
There are many resources available for those who want to learn more about canning for beginners, including books, online tutorials, and local classes. The National Center for Home Food Preservation is a great place to start for comprehensive information and safety guidelines.

